Entity Framework হল একটি ORM framework. ORM এর elaboration হল Object Relational Mapping।
Object Relational Mapping framework কি
Database tables এর উপর ভিত্তি করে automatically classes তৈরি করা Object Relational Mapping framework এর কাজ। আবার উল্টা দিক থেকে classes গুলোর উপর basis করে database tables ও create করতে পারে এই Object Relational Mapping framework। এই class গুলোর উপর ভিত্তি করে database tables গুলো তৈরি করার সময় necessary SQL তৈরি করে থাকে ORM [Object Relational Mapping].
চলুন একটা উদাহরণ দিয়ে দেখি যে, Entity Framework আমাদের কি provide করে থাকে -
মনে করি আমাদের কাছে নিচের মত ২ টা table আছে


এই output achieve করতে হলে-
1. আমদের Department এবং Employee classes তৈরি করতে হবে
2. ADO.NET code লিখতে হবে database থেকে data retrieve করার জন্য
3. Data retrieved হয়ে গেলে আমদের Department এবং Employee objects create করতে হবে, আবার এই Department এবং Employee objects গুলোকে data দিয়ে populate করতে হবে।
যদি আমরা database schema provide করি তাহলে Entity Framework উপরের এই কাজগুলো automatically করতে পারে
Step 1: একটা নতুন "Empty ASP.NET Web Application" তৈরি করবো name=Demo.
N.B: Practical ধাপগুলো আমি আপনাদের বোঝার সুবিধার জন্য English এ explain করবো। এই step গুলো VS2017(Visual Studio 2017) এ execute করা হয়েছে।
Step 2: Installing NuGet Package Manager
a) Click on Tools - NuGet Package Manager - Manage NuGet Packages for solution
b) Click on the "Browse" tab in "Manage Packages Solution" window
c) Search for NuGet
d) Finally Download NuGet Package Manager and install
 |
| Installing Nuget Package Manager |
Please note: You must restart visual studio for the changes to take effect.
step 3: Installing Entity Framework
a) Click on Tools - NuGet Package Manager - Manage NuGet Packages for solution
b) Click on the "Browse" tab in "Manage Packages Solution" window
c) Search for Entity Framework
d) Finally, click on the "Install" button.

At this point Entity Framework version, 5.0.0 is installed and a reference to EntityFramework assembly is also automatically added.

Create table Departments
(
ID int primary key identity,
Name nvarchar(50),
Location nvarchar(50)
)
Create table Employees
(
ID int primary key identity,
FirstName nvarchar(50),
LastName nvarchar(50),
Gender nvarchar(50),
Salary int,
DepartmentId int foreign key references Departments(Id)
)
Step 5: Populate the tables created in Step 4, with data
Insert into Departments values ('IT', 'New York')
Insert into Departments values ('HR', 'London')
Insert into Departments values ('Payroll', 'Sydney')
Insert into Employees values ('Mark', 'Hastings', 'Male', 60000, 1)
Insert into Employees values ('Steve', 'Pound', 'Male', 45000, 3)
Insert into Employees values ('Ben', 'Hoskins', 'Male', 70000, 1)
Insert into Employees values ('Philip', 'Hastings', 'Male', 45000, 2)
Insert into Employees values ('Mary', 'Lambeth', 'Female', 30000, 2)
Insert into Employees values ('Valarie', 'Vikings', 'Female', 35000, 3)
Insert into Employees values ('John', 'Stanmore', 'Male', 80000, 1)
Step 6: Right click on the project in solution explorer and add ADO.NET Entity Data Model. Change the name from Model1.edmx to EmployeeModel.edmx
 |
| Adding Entity Data Model |
Step 7: Select "Generate from database" and click "Next"
Step 8: Choose Your Data Connection
a) Click on "New Connection" button
b) Select "Microsoft SQL Server" as Data source, and ".Net Framework Data Provider for SQL Server" option from "Data provider" drop-down list. Click Continue.
c) On "Connection Properties" screen, specify SQL Server Name. If you are using local installation of SQL Server then use (local) or . in the "server name" dropdown list.
d) Specify the Authentication you want to use.
e) Select the database from "Select or enter database name" dropdownlist.
f) Finally "Test connection" and click "OK"
g) At this point, we should be back on "Choose Your Data Connection" window. Make sure "Save entity connection settings in Web.Config as" checkbox is selected and change the name of the connection string to "EmployeeDBContext" and then Click "Next"
Step 9: On "Choose Your Database Objects" screen, select "Departments" and "Employees" tables. Change the Model Namespace to "EmployeeModel" and click "Finish". At this point you should have EmployeeModel.edmx created.

EmployeeModel.Designer.cs file is also generated. This file contains Employee and Department classes. Tables are mapped to classes and columns are mapped to class properties.
Step 10: Add a webform. Drag and drop a GridView and an EntityDataSource control on the webform.
Step 11: Build the solution. Flip the WebForm1.aspx to design mode.
a) Right click on EntityDataSource control and select "Show smart tag" option from the context menu.
b) Click on "Configure Data Source" link
c) Select "Named Connection" radio button and select "EmployeeDBContext" from the dropdown list.
d) Select "EmployeeDBContext" option from "DefaultContainerName" drop-down list and click "Next"
e) On "Configure Data Selection" screen, select "Departments" from "EntitySetName" drop-down list and click "Finish"
f) Right click on "GridView1" control and select "Show smart tag" option.
g) Click on "Auto Format" link and select "Colorful" option from "AutoFormat" window and click "OK".
h) Select "EntityDataSource1" from "Choose Data Source" drop-down list.
I) Click on "Eidt Columns" link and add a "Template Field". Set HeaderText=Employees and click OK.
j) Now click "Edit Templates" link.
k) Drag and drop a GridView control
l) Select "Edit DataBindings" link
m) Select "Custom binding" radio button and type Eval("Employees") in "Code expression" textbox and click OK.
n) Select "End Template Editing" option from "GridView1" smart tasks pane.
Step 12: Right-click on "EntityDataSource1" control and select "Properties". In properties window set Include=Employees
এখন application টি run করলে দেখব আমরা আমাদের expectecd output পেয়েছি, এবং এক লাইন ও code না লিখে।
উপরের explanations আরও ভালভাবে বুঝতে এই video টি একবার দেখে আসুন। ধন্যবাদ।।
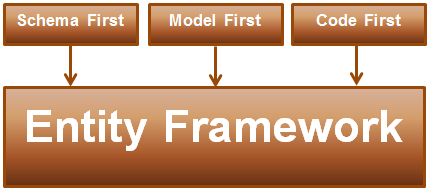
এই আর্টিকেলে আমরা Entity Framework এর schema first approach টা use করেছি। আমরা আরও Model First অথবা Code First approaches ও use করতে পারি, আমরা পরবর্তী আর্টিকেল গুলোতে ধারাবাহিকভাবে Entity Framework এর অন্যান্য approach গুলো নিয়ে আলোচনা করবো ।
No comments:
Post a Comment